Minecraft is a sandbox video game developed and published by Mojang Studios. It was created by Markus “Notch” Persson and released as a public alpha for PC in 2009 before its official release in November 2011. The game has since become one of the best-selling video games of all time, with over 200 million copies sold across all platforms.
How to Install Minecraft Server on Ubuntu 24.04
Before starting the installation you need to update the package lists using the command:
sudo apt updateMinecraft requires Java to run. Ubuntu 24.04 should have OpenJDK available. To install it run the command:
sudo apt install openjdk-21-jdkNext, navigate to the home directory:
cd ~Then create the directory for the future Minecraft server. For example, name it minecraft:
mkdir minecraftAnd navigate the created directory:
cd minecraftNext, get the download link for the latest version from the download page.

To download the archive containing Minecraft distribution run the command wget using the copied link:
wget https://piston-data.mojang.com/v1/objects/59353fb40c36d304f2035d51e7d6e6baa98dc05c/server.jarAs a result, you will find server.jar file in the current directory. To verify this run the command ls -la:

This completes the installation. So let’s move on to the first Minecraft server launch.
First Minecraft Server Launch
server.jar is an executable file in Java format that contains all the necessary components to run the Minecraft server.
With the following command, make the first start of your Minecraft server from the directory ~/minecraft:
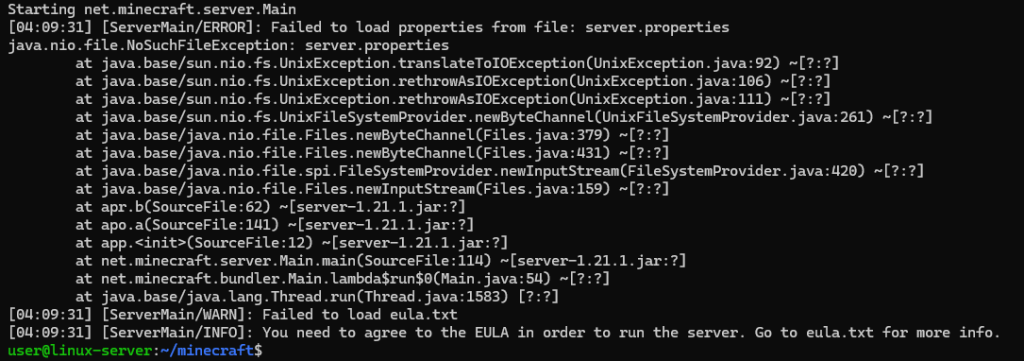
java -Xmx1024M -Xms1024M -jar server.jar noguiIt is highly likely that the first launch will fail:

This error means that the Minecraft server has not found files in the current directory eula.txt and server.properties. The first of the files is the license agreement file, the second is the configuration file. At the time of the launch of the Minecraft server, they really were not there. But at the same time, they were created during the first launch. To make sure they are available, check the contents of the current directory using the command:
ls -lWe can see that this is actually the case:

Now edit eula.txt using the nano text editor:
nano eula.txtThe contents of the file look like this:
#By changing the setting below to TRUE you are indicating your agreement to our EULA (https://aka.ms/MinecraftEULA).
#Fri Aug 23 04:09:31 UTC 2024
eula=false
In particular, the file contains a link to the Minecraft user agreement. If you agree with its provisions, replace the line eula=false with eula=true in the text of the file. Then close the file and save the changes you have made using the keyboard shortcut Ctrl X, then press Y and Enter.
After that, launch the server again with the command:
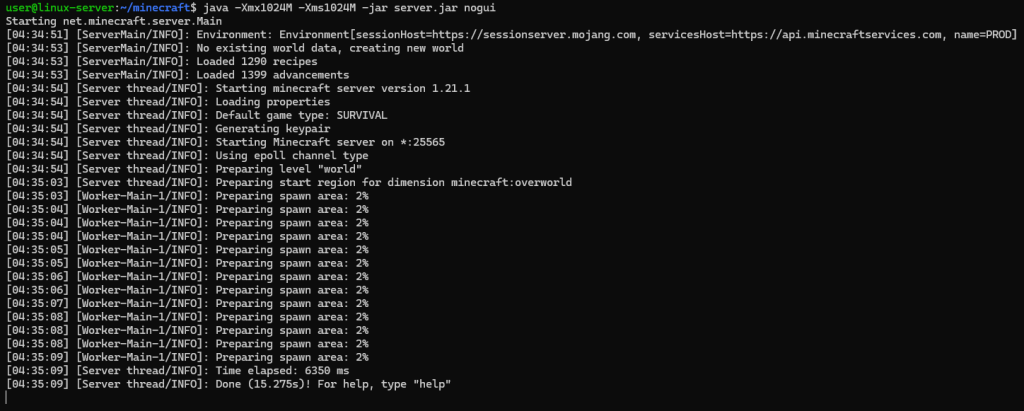
java -Xmx1024M -Xms1024M -jar server.jar nogui
Now your server is running. To stop the Minecraft server, use the command:
stopYou also need to edit the server.properties file. In it, we are interested in the online-mode parameter, which is responsible for whether or not our Minecraft server will authenticate player accounts using official Mojang servers. In order for our server to allow access to players without such verification, the online-mode parameter must be set to false. To make changes to this configuration file, open it using the nano text editor:
nano server.propertiesFind the line with the online-mode parameter and make it look like:
online-mode=falseThen close the server.properties file and save the changes you have made.
Next, launch the Minecraft server again:
java -Xmx1024M -Xms1024M -jar server.jar noguiConnecting to the Game
After launching the server you can already connect to the virtual Minecraft world from a local computer. To do this, you need to use the launcher software that is used to launch the game. The launcher downloads the necessary files and resources, checks the integrity of the game, updates the client if there are updates available, and then launches the game itself. To install the launcher download the appropriate installer and run it to install the necessary software on your computer.
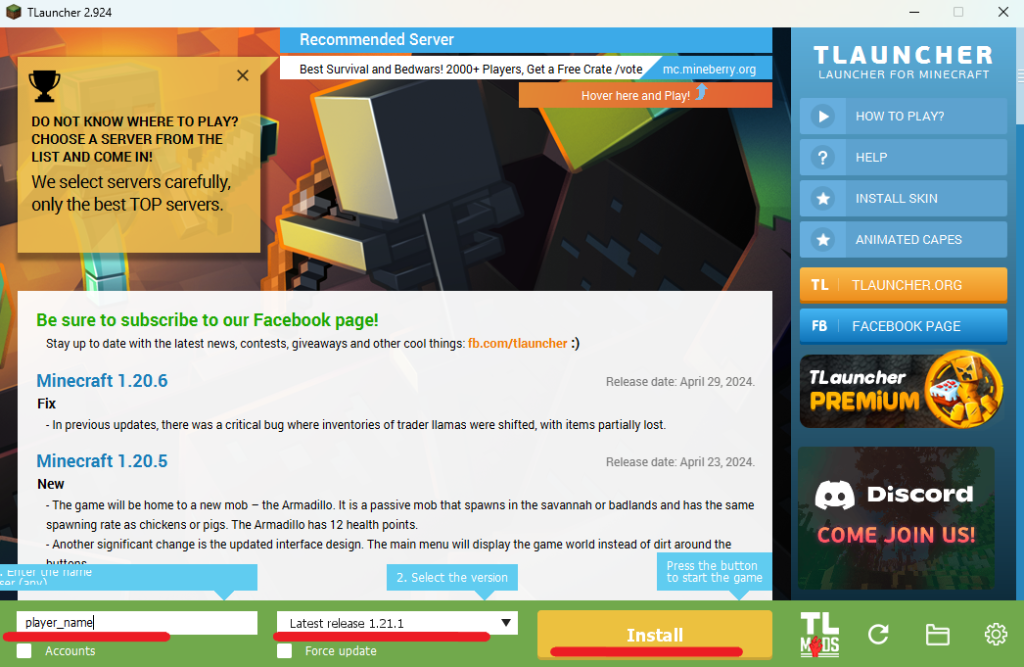
Once the launcher have been installed, launch it. Then, at the bottom of its interface, specify the name of your player, the version of the game and click Install:

After some time, which will take to install the game in the launcher and restart it, select Multiplayer in the menu:

To connect the launcher to your server, click the Direct Connection button:

Enter the IP address of your Minecraft server In the Server Address line and click Join Server:

After that you will find yourself in the virtual world of Minecraft, which is deployed on your virtual dedicated server. Weclome!

Conclusion
So we looked at how to install Minecraft server on Ubuntu 24.04.
Installing Minecraft server is a rewarding experience that opens up endless possibilities for customization and multiplayer gameplay. By following the steps outlined in this guide, you can successfully install and configured your server, allowing you to host your own Minecraft world. Whether you’re hosting a private game for friends or building a large community, maintaining your server will be key to your success. Happy gaming!
![]()
